Exercise 4.1: Creating a Tower Job Template
Read this in other languages:  English,
  日本語.
日本語.
Table of Contents
Objective
Demonstrate a BIG-IP Virtual Server configuration job template for Red Hat Ansible Tower. This job template will create a virtual server, a pool, and add two web servers to the pool .
To run an Ansible Playbook in Ansible Tower, we need to create a Job Template. A Job Template requires:
- A Credential to login to devices.
- An Inventory to run the job against
- A Project which contains Ansible Playbooks
Guide
Step 1: Create a Project
-
In the Ansible web UI, click on the
Projectslink under theRESOURCESsection using the left navigation bar. -
Click on the green
 button to create a new project
 -
Fill out the project parameters as follows, and click
SaveParameter Value NAME Workshop Project ORGANIZATION Default SCM TYPE Git SCM URL https://github.com/f5devcentral/ansible-tower-workshop-examples.git Update Revision on Launch ✓
NOTE: There may be additional projects setup in your environment. Each project represents a repository of Ansible Playbooks. It is completly normal to have multiple projects.
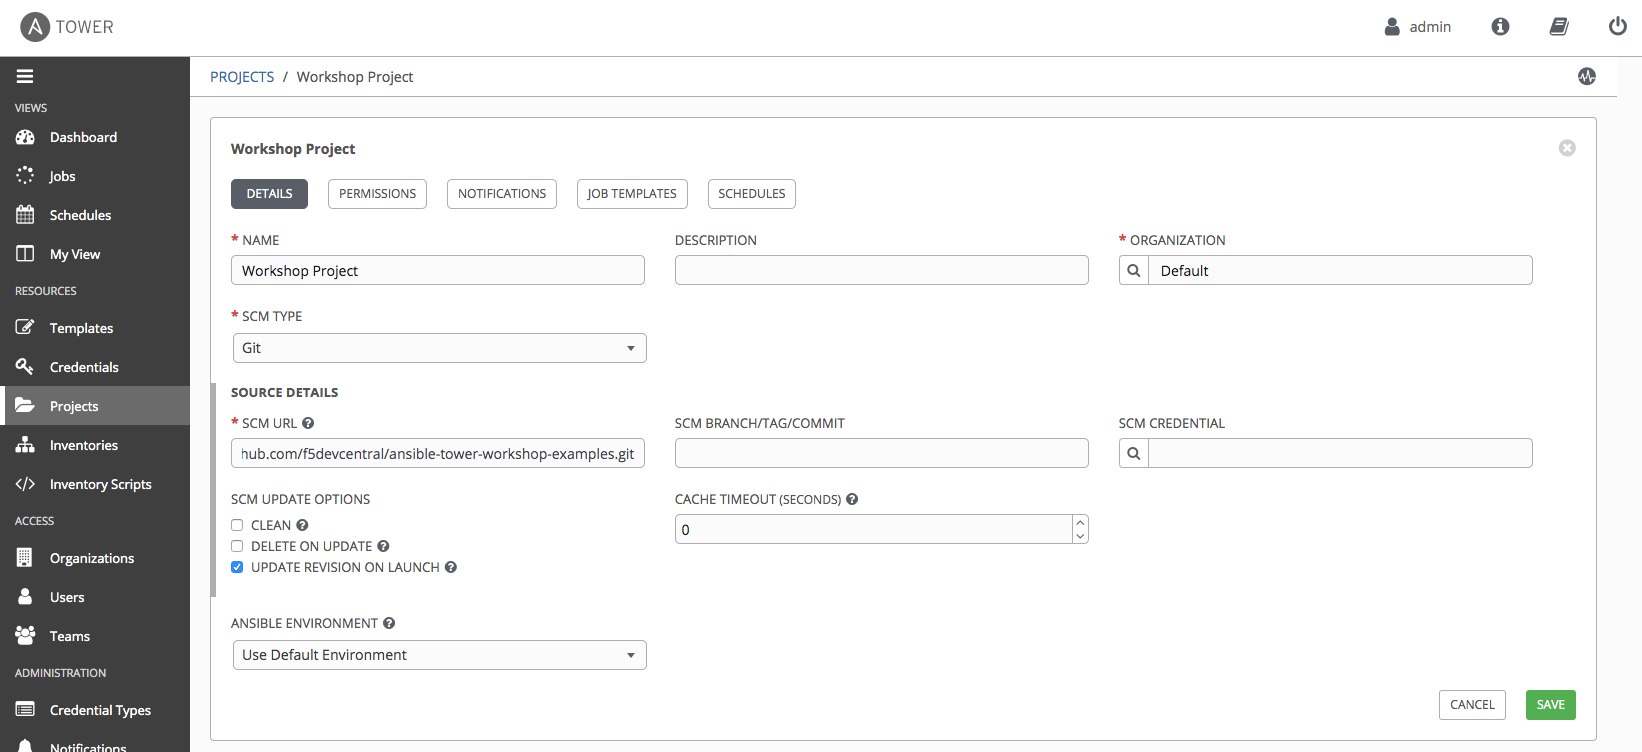
All the playbooks are availabe at https://github.com/f5devcentral/ansible-tower-workshop-examples, and you may take a look at what’s behind each playbook.
For reference, here is one of the playbooks that was imported and will be executed later in this lab.
create_vs.yml
---
- name: BIG-IP SETUP
  hosts: lb
  connection: local
  gather_facts: false

  tasks:
    - name: Setting up provider values
      set_fact:
       provider:
        server: ""
        server_port: "8443"
        validate_certs: "False"

    - name: CREATE NODES
      bigip_node:
        provider: ""
        host: ""
        name: ""
      loop: ""

    - name: CREATE POOL
      bigip_pool:
        provider: ""
        name: "http_pool"
        lb_method: "round-robin"
        monitors: "/Common/http"
        monitor_type: "and_list"

    - name: ADD POOL MEMBERS
      bigip_pool_member:
        provider: ""
        state: "present"
        name: ""
        host: ""
        port: "80"
        pool: "http_pool"
      loop: ""

    - name: ADD VIRTUAL SERVER
      bigip_virtual_server:
        provider: ""
        name: "vip"
        destination: ""
        port: "443"
        enabled_vlans: "all"
        all_profiles: ['http','clientssl','oneconnect']
        pool: "http_pool"
        snat: "Automap"

    - name: PRINT OUT WEB VIP FOR F5
      debug:
        msg: "The VIP (Virtual IP) is https://"
Step 2: Create BIGIP Credentials
Before we can create a job we must create the credentials to authenticate to BIGIP.
-
Open the web UI and click on the
Credentialslink under theRESOURCESsection using the left navigation bar.
-
Click on the green
 button to create a new credentials template.
 -
Fill out the fields with the following credentials template parameters as follows:
Parameter Value NAME BIGIP CREDENTIAL TYPE Network USERNAME admin PASSWORD NOTE: The password can be found in the Workbench Information section of the webpage that contains your student lab information. If you’re unsure of the password please ask the instructor for help.
-
Click SAVE
Step 3: Create a Job Template
-
Open the web UI and click on the
Templateslink under theRESOURCESsection using the left navigation bar.
-
Click on the green
 button to create a new job template
Make sure to select
Job Templateand notWorkflow Template -
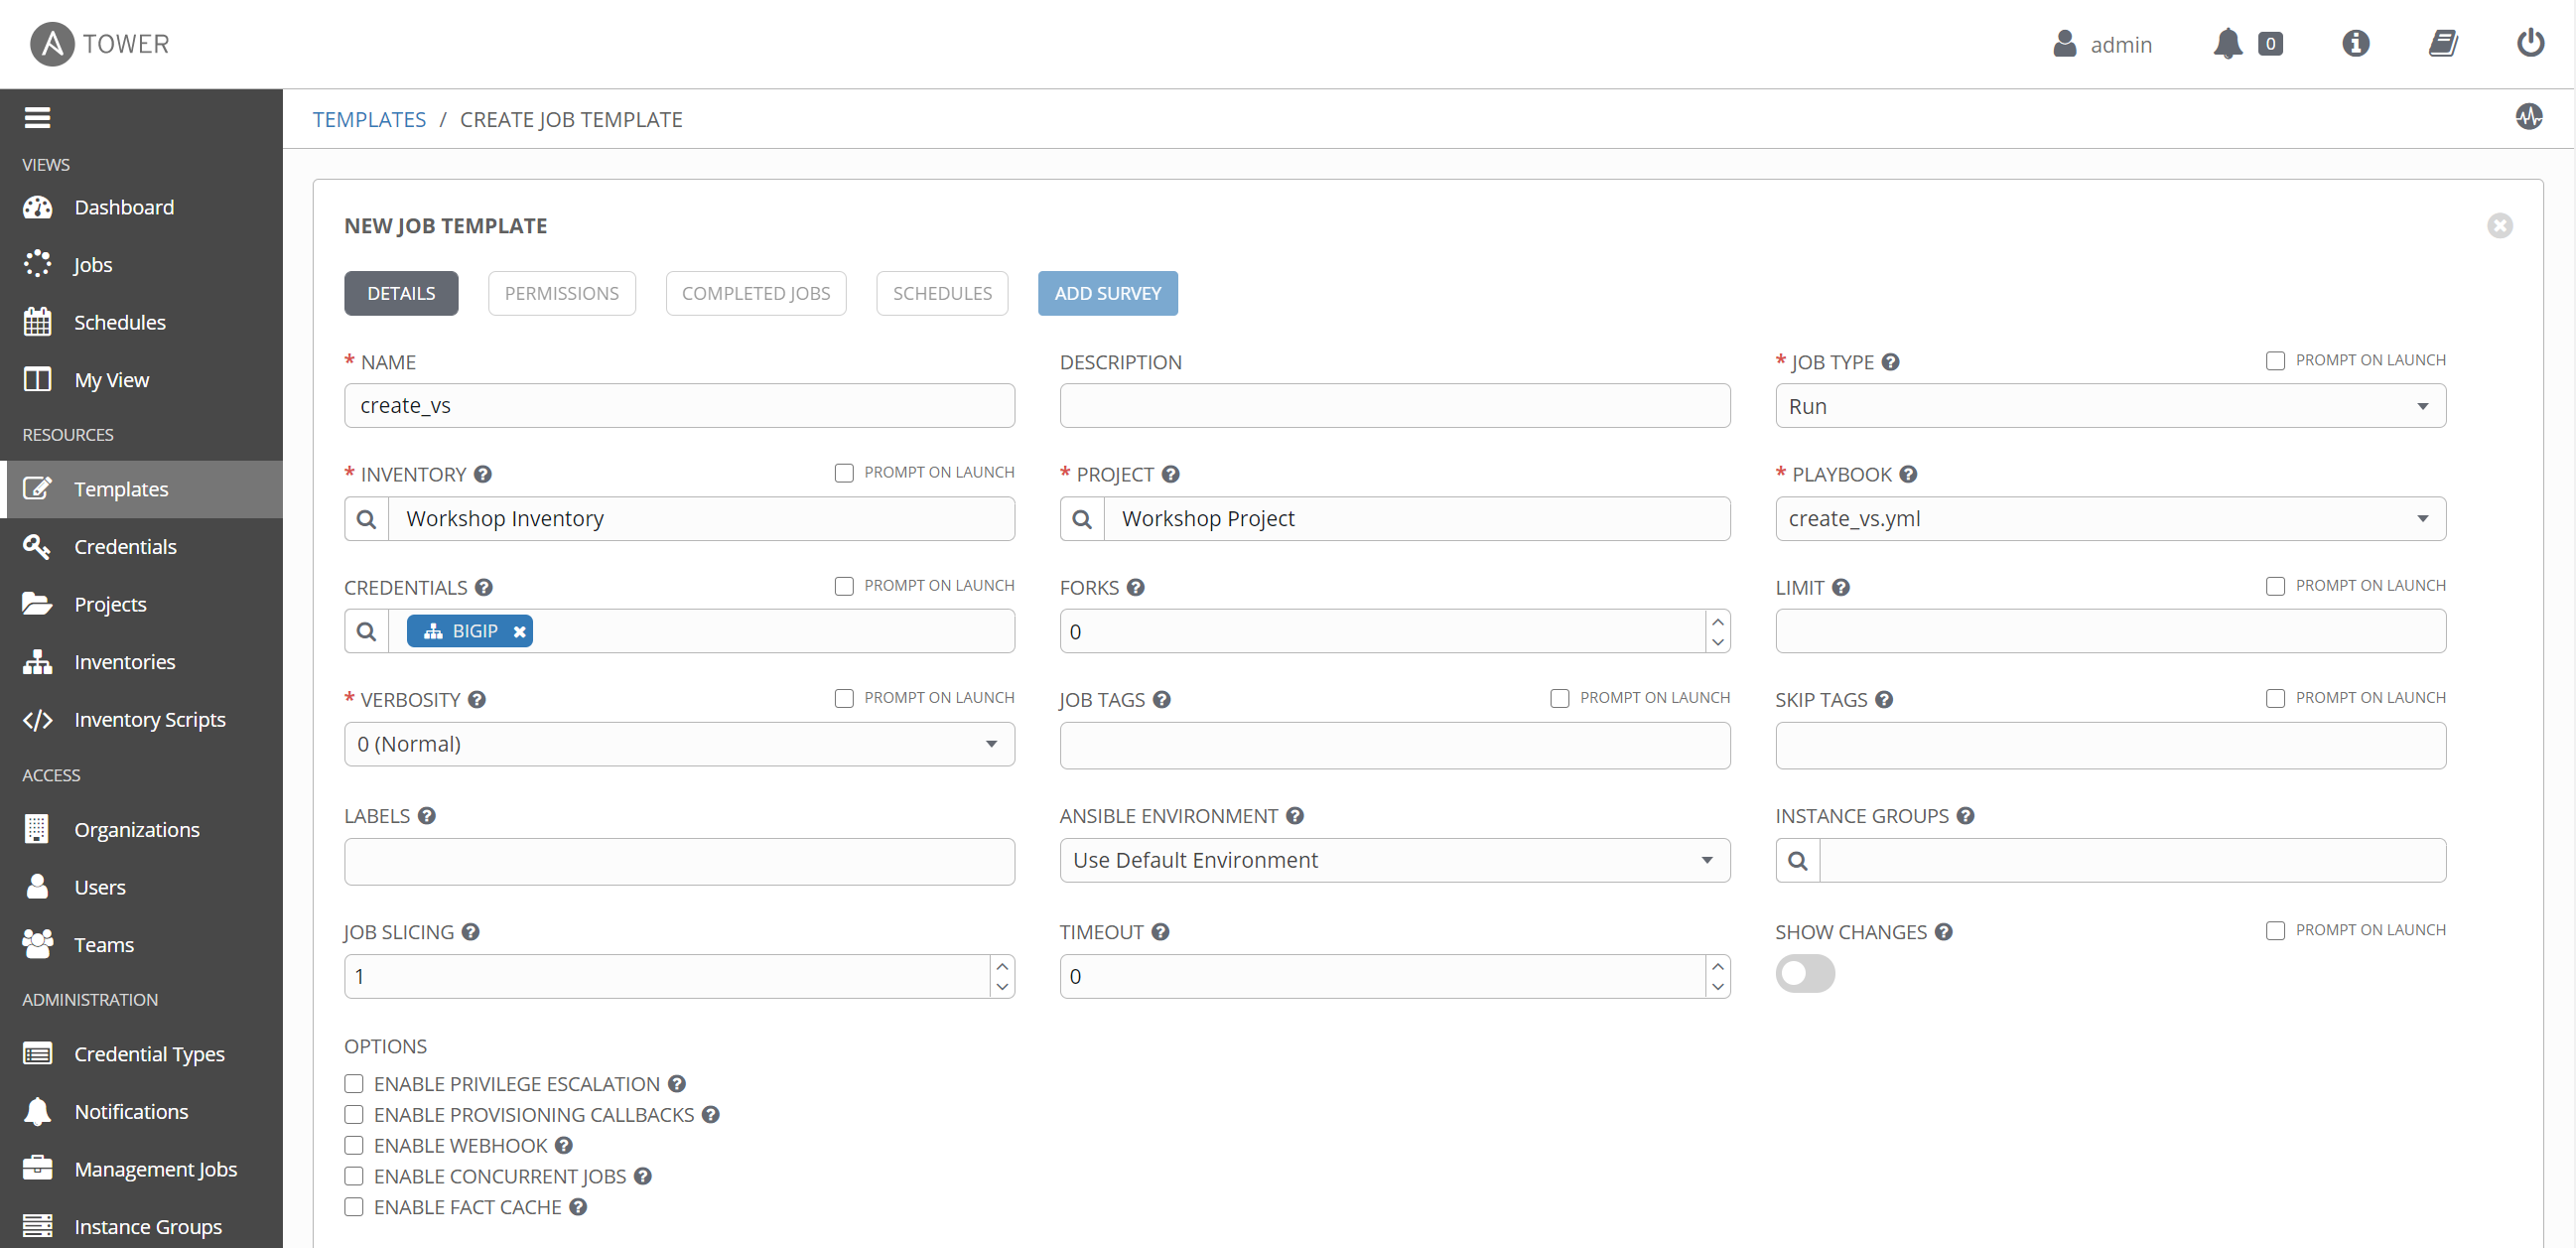
Fill out the job template parameters as follows:
Parameter Value NAME create_vs JOB TYPE Run INVENTORY Workshop Inventory PROJECT Workshop Project PLAYBOOK create_vs.yml CREDENTIALS BIGIP From the CREDENTIAL TYPE select
Network, then seletctBIGIP:
Here is a screenshot of the job template with parameters filled out:
-
Scroll down and click the green
SAVEbutton.
Step 4: Launch the Job Template
-
Navigate back to the
Templateswindow, where all Job Templates are listed. -
Launch the
create_vsJob Template by clicking the Rocket button.
When the rocket button is clicked this will launch the job. The job will open in a new window called the Job Details View. More info about Tower Jobs can be found in the documentation.
Step 5: Examine the Job Details View
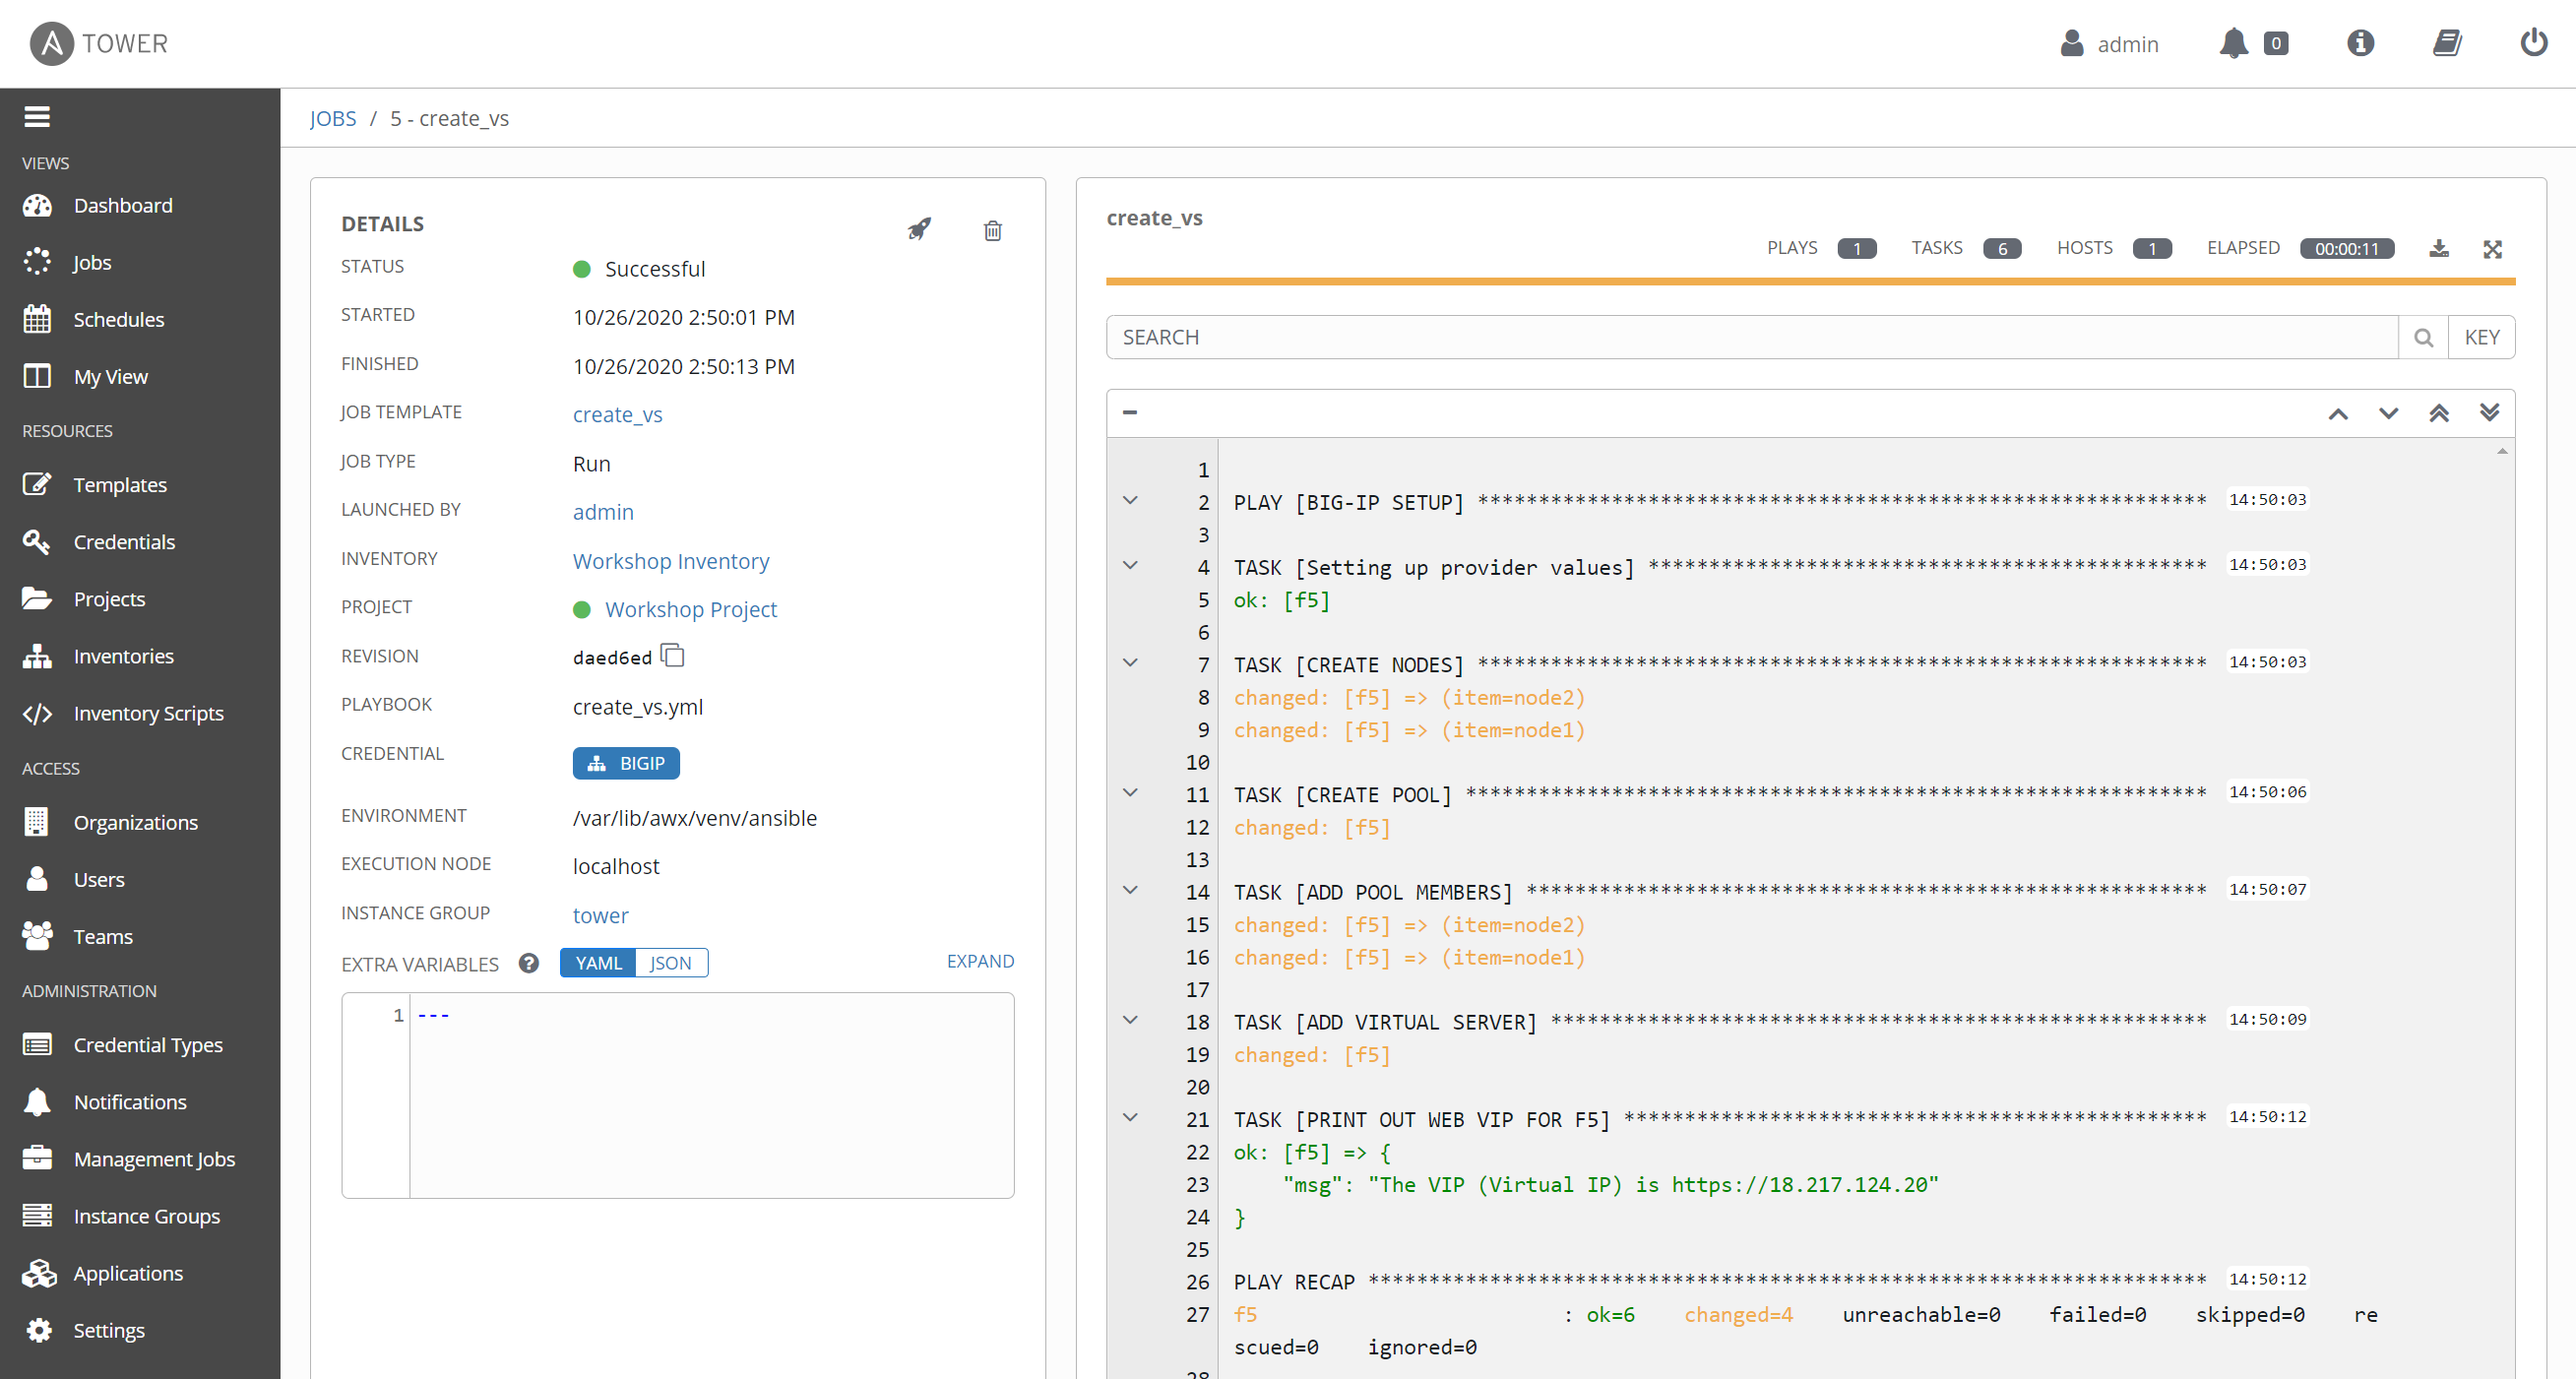
On the left side there is a DETAILS pane, on the right side there is the Standard Out pane.
-
Examine the Details pane
The Details pane will provide information such as the timestamp for when the job started and finished, the job type (Check or Run), the user that launched the job, which Project and Ansible Playbook were used and more.
If the Job has not finished yet, the Details Pane will have a cancel button
 that can be used to stop the Job.
 -
Examine the Standard Out pane
The Standard Out pane will display the output from the Ansible Playbook. Every task output will match exactly what would be seen on the command line.
-
Click on the Expand Output button

This will expand the Standard Out pane to take the entirety of the window.
-
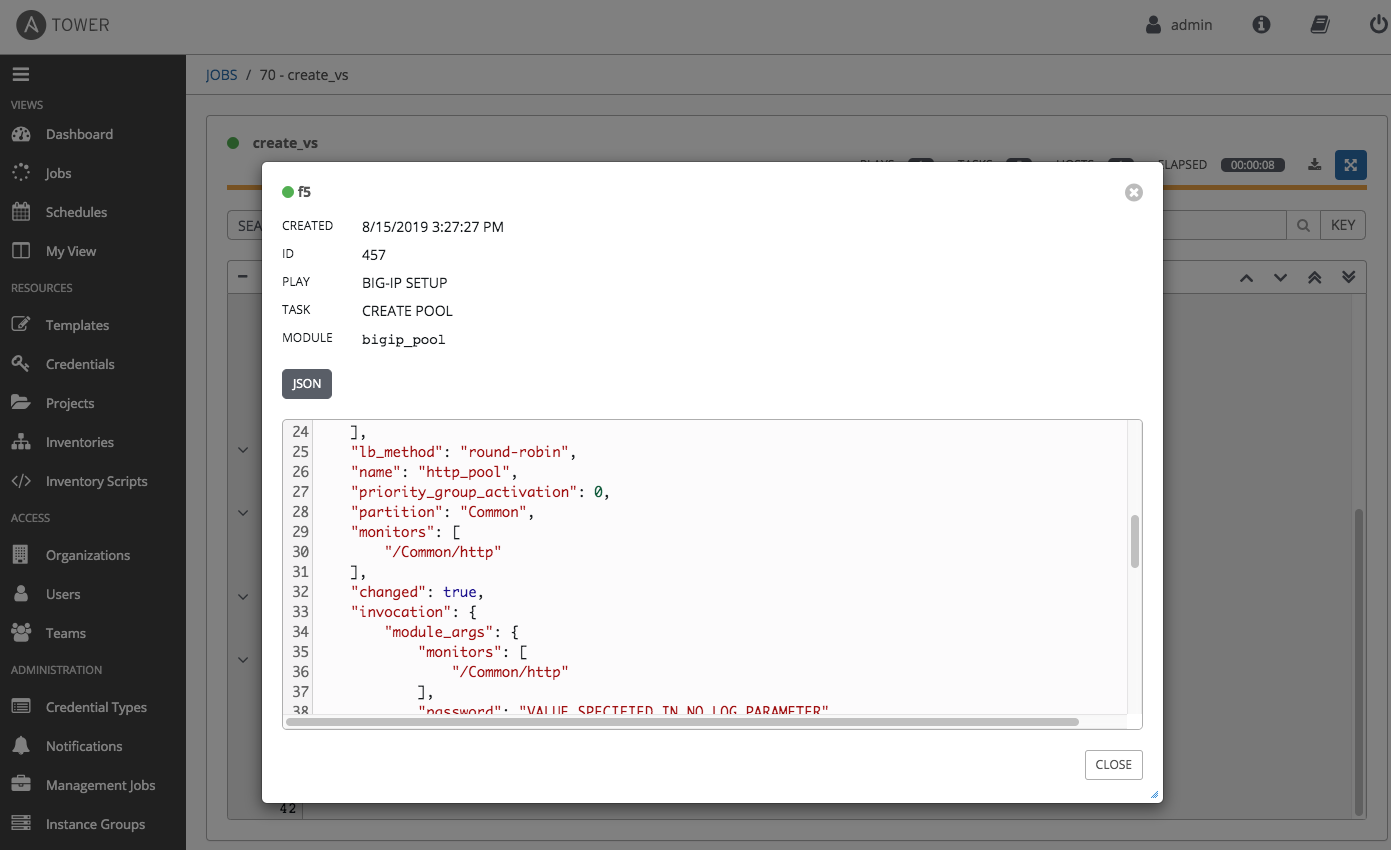
Click on a task in the Standard Out pane to open up structured output from that particular task.
Click on any line where there is a changed or ok
Step 6: Examine the Jobs window
Any Job Template that has been run or is currently running will show up under the VIEWS –> Jobs window.
-
Click the Jobs button the left menu.

The Jobs link displays a list of jobs and their status–shown as completed successfully or failed, or as an active (running) job. Actions you can take from this screen include viewing the details and standard output of a particular job, relaunch jobs, or remove jobs.
-
Click on the
create_vsJob
The
create_vsjob was the most recent (unless you have been launching more jobs). Click on this job to return to the Job Details View. Ansible Tower will save the history of every job launched.
Step 7: Verify the BIG-IP Virtual Server was created
Login to the F5 BIG-IP with your web browser to see what was configured. Login information for the BIG-IP:
- username: admin
- password: provided by instructor defaults to ansible
The load balancer virtual server can be found by navigating the menu on the left. Click on Local Traffic then Virtual Servers. See the screenshot below:

Step 8: Verifying the web servers
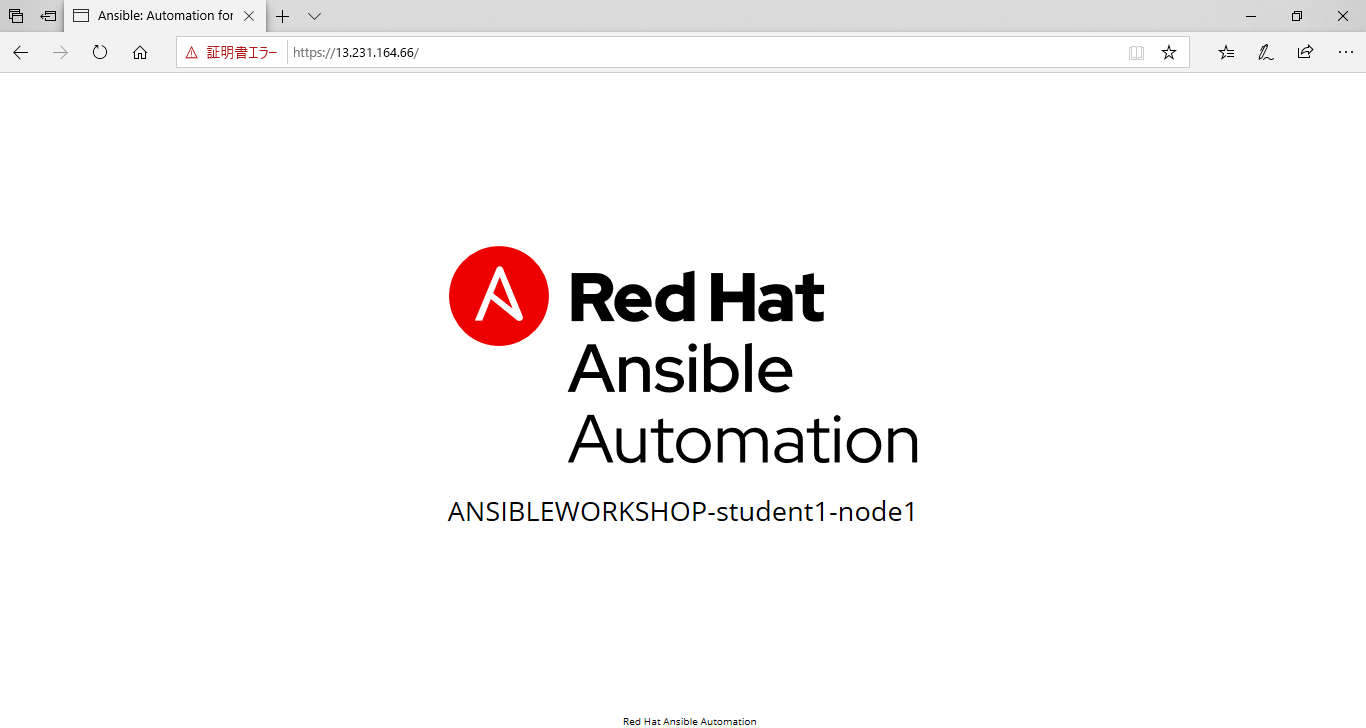
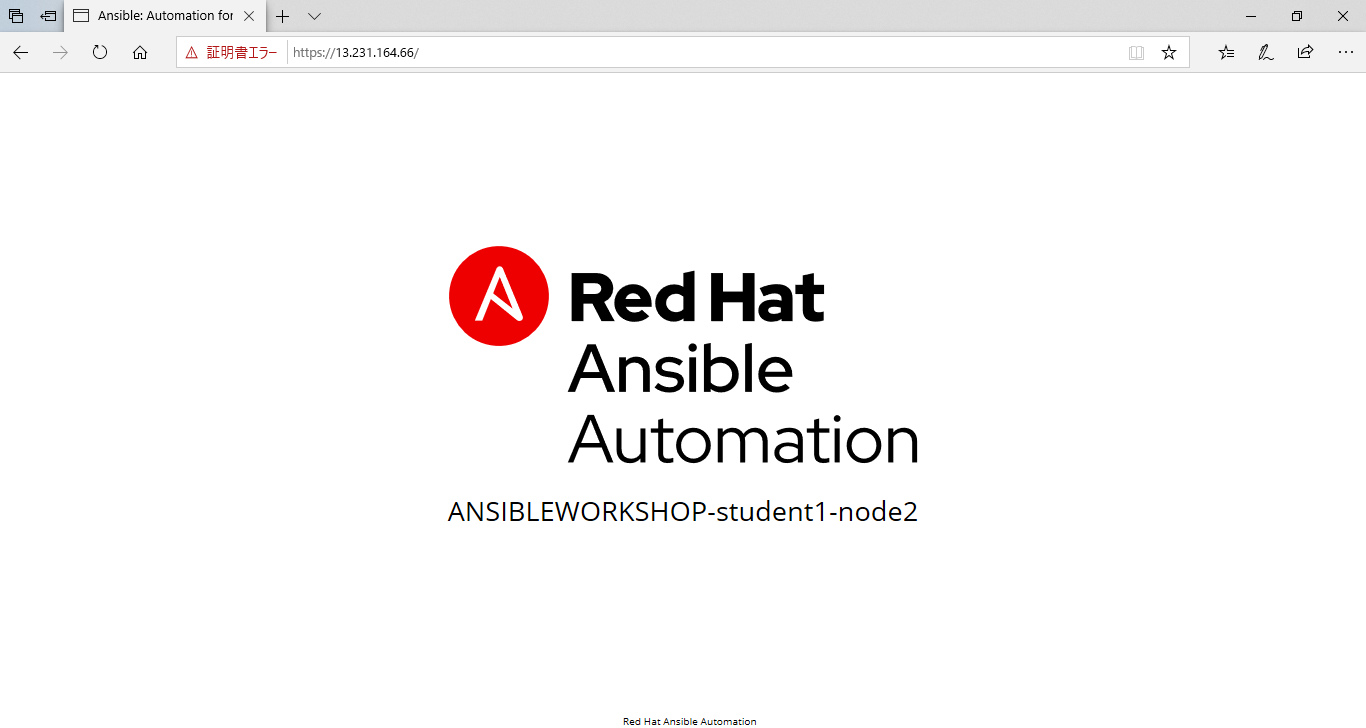
Each of the two RHEL web servers actually already has apache running. Open up the public IP of the F5 load balancer in your web browser:
This time use port 443 instead of 8443, e.g. https://X.X.X.X:443/
Each time you refresh, BIG-IP will load balance the traffic between node1 and node2, as shown below:
Takeaways
You have successfully demonstrated
- Creating a Job Template to deploy a Virtual Server
- Launching a Job Template from the Ansible Tower UI
- Verifying the Virtual Server is correctly created
- Veryfying the web server is up and running
Complete
You have completed lab exercise 4.1
Click here to return to the Ansible Network Automation Workshop
