Exercise 3.0 - Introduction to AS3
Read this in other languages:  English,
  日本語.
日本語.
Table of Contents
Objective
Demonstrate building a virtual server (exactly like the Section 1 Ansible F5 Exercises) with F5 AS3
- Learn about AS3 (Application Services 3 Extension) declarative model. It is not the intention of this exercise to learn AS3 thoroughly, but just give some introduction to the concept and show how it easily integrates with Ansible Playbooks.
- Learn about the set_fact module
- Learn about the uri module
Guide
Make sure the BIG-IP configuration is clean, run exercise 2.1-delete-configuration before proceeding
Step 1:
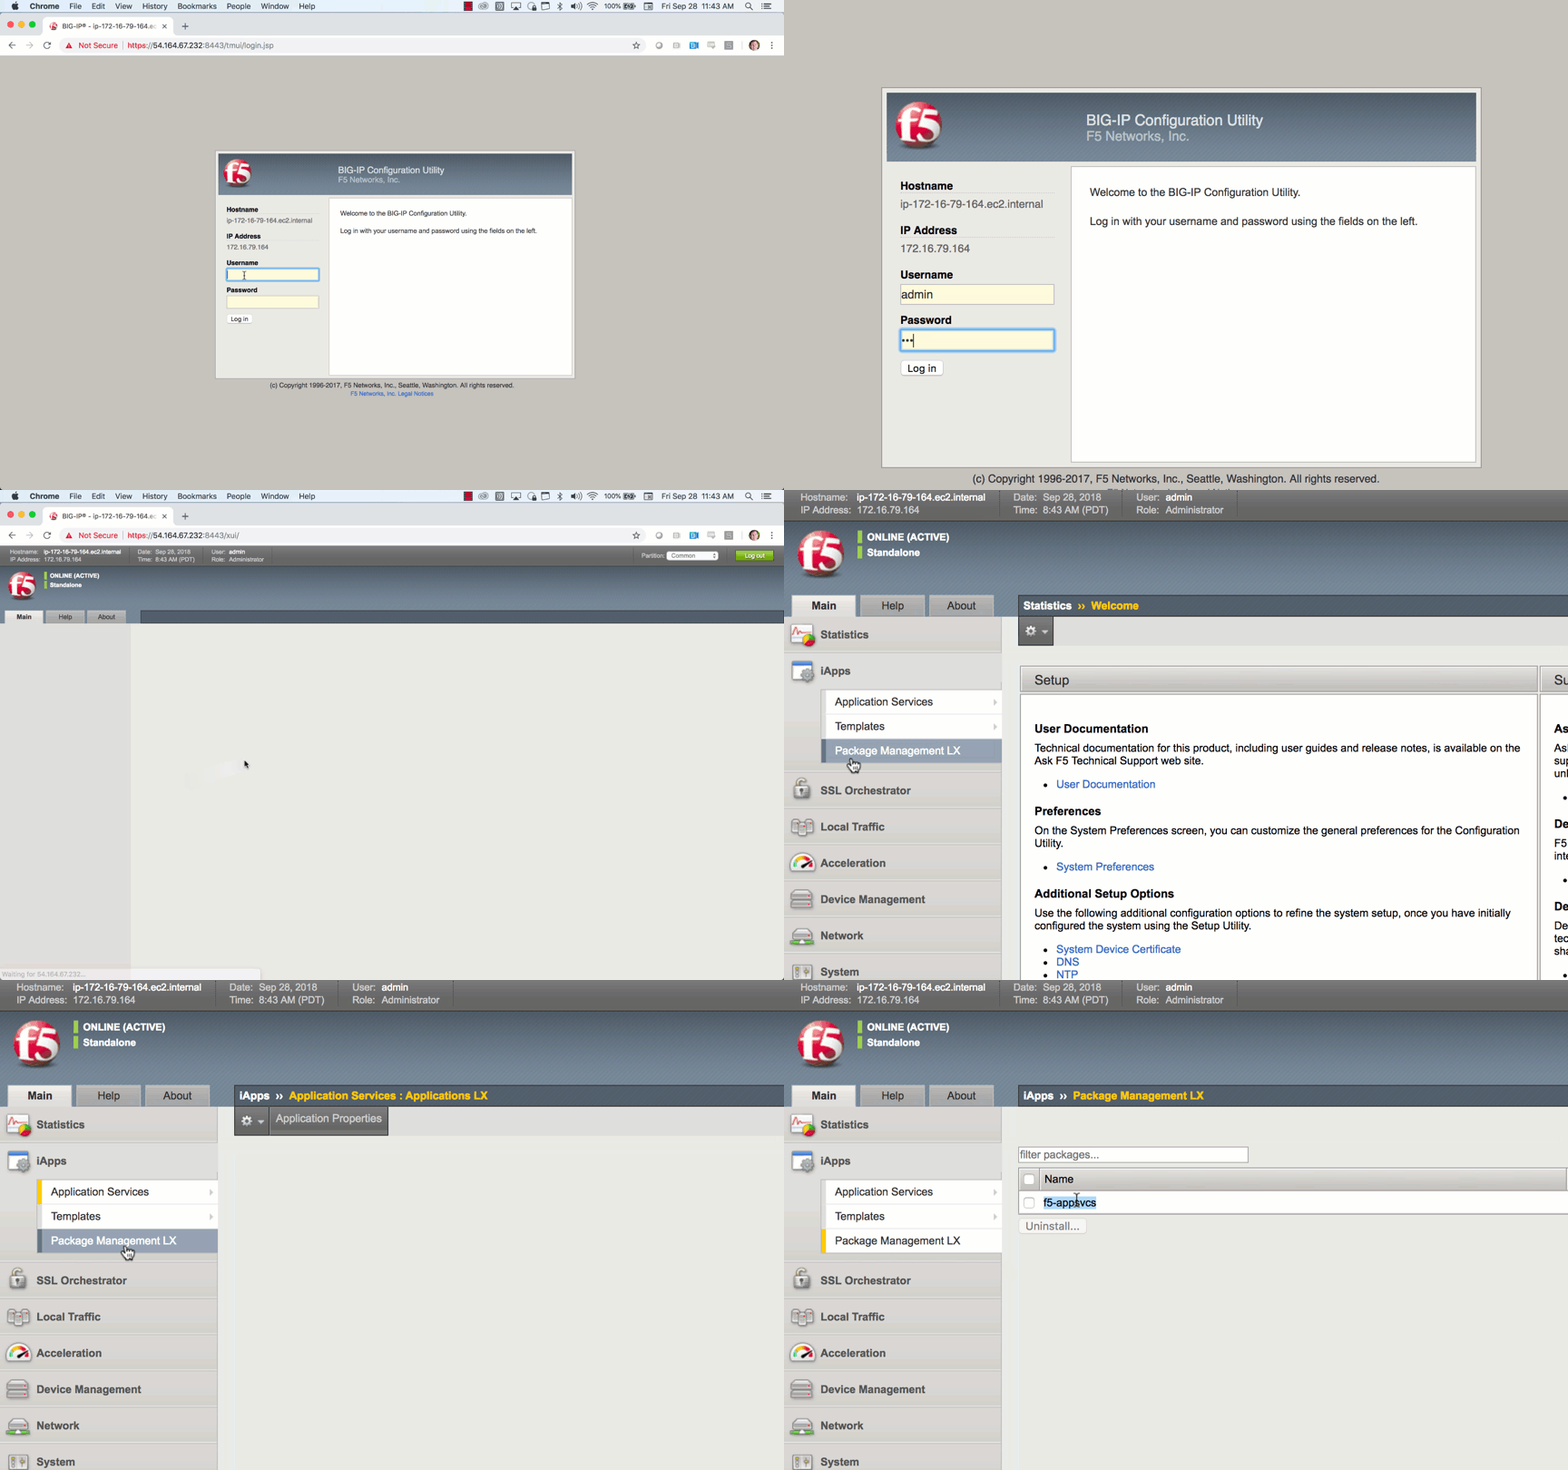
Make sure the F5 BIG-IP has AS3 enabled.
- Login to the F5 BIG-IP through your web browser.
- Click on the iApps button on the lefthand menu.
- Click the
Package Management LXLink - Make sure that
f5-appsvcsis installed.
If this is not working please ask your instructor for help.

Step 2:
Before starting to build a Playbook, its important to understand how AS3 works. AS3 requires a JSON template to be handed as an API call to F5 BIG-IP. The templates are provided for this exercise. You do not need to fully understand every parameter, or create these templates from scratch. There are two parts:
tenant_base.j2
{
    "class": "AS3",
    "action": "deploy",
    "persist": true,
    "declaration": {
        "class": "ADC",
        "schemaVersion": "3.2.0",
        "id": "testid",
        "label": "test-label",
        "remark": "test-remark",
        "WorkshopExample":{
            "class": "Tenant",
            {{ as3_app_body }}
        }
    }
}
tenant_base is a standard template that F5 Networks will provide to their customers. The important parts to understand are:
"WorkshopExample"- this is the name of our Tenant. The AS3 will create a tenant for this particular WebApp. A WebApp in this case is a virtual server that load balances between our two web servers."class": "Tenant"- this indicates thatWorkshopExampleis a Tenant.as3_app_body- this is a variable that will point to the second jinja2 template which is the actual WebApp.
as3_template.j2
"web_app": {
    "class": "Application",
    "template": "http",
    "serviceMain": {
        "class": "Service_HTTP",
        "virtualAddresses": [
            "{{private_ip}}"
        ],
        "pool": "app_pool"
    },
    "app_pool": {
        "class": "Pool",
        "monitors": [
            "http"
        ],
        "members": [
            {
                "servicePort": 443,
                "serverAddresses": [
                    {% set comma = joiner(",") %}
                    {% for mem in pool_members %}
                        {{comma()}} "{{  hostvars[mem]['ansible_host']  }}"
                    {% endfor %}

                ]
            }
        ]
    }
}
This template is a JSON representation of the Web Application. The important parts to note are:
- There is a virtual server named
serviceMain.- The template can use variables just like tasks do in previous exercises. In this case the virtual IP address is the private_ip from our inventory.
- There is a Pool named
app_pool- The jinja2 template can use a loop to grab all the pool members (which points to our web servers group that will be elaborated on below).
In Summary the tenant_base.j2 and as3_template.j2 create one single JSON payload that represents a Web Application. We will build a Playbook that will send this JSON payload to a F5 BIG-IP.
COPY THESE TEMPLATES TO YOUR WORKING DIRECTORY
mkdir j2
cp ~/f5-workshop/3.0-as3-intro/j2/* j2/
Step 3:
Using your text editor of choice create a new file called as3.yml:
vimandnanoare available on the control node, as well as Visual Studio and Atom via RDP
Step 4:
Enter the following play definition into as3.yml:
---
- name: LINKLIGHT AS3
  hosts: lb
  connection: local
  gather_facts: false

  vars:
    pool_members: "{{ groups['web'] }}"
- The
---at the top of the file indicates that this is a YAML file. - The
hosts: lb, indicates the play is run only on the lb group. Technically there only one F5 device but if there were multiple they would be configured simultaneously. connection: localtells the Playbook to run locally (rather than SSHing to itself)-
gather_facts: falsedisables facts gathering. We are not using any fact variables for this playbook. - The
varssection sets a variable namedpool_members, to the web group. There are two web on the workbench,node1andnode2. This means that thepool_membersvariable refers to a list of two web.
Step 5
Append the following to the as3.yml Playbook.
  tasks:
    - name: CREATE AS3 JSON BODY
      set_fact:
        as3_app_body: "{{ lookup('template', 'j2/as3_template.j2', split_lines=False) }}"
The module set_fact module allows a Playbook to create (or override) a variable as a task within a Play. This can be used to create new facts on the fly dynamically that didn’t exist until that point in the Play. In this case the template lookup plugin is being used. This task
- renders the j2/as3_template.j2 jinja template that is provided.
- creates a new fact named
as3_app_bodythat is just JSON text.
Step 6
Append the following to the as3.yml Playbook. This task uses the uri module which is used to interact with HTTP and HTTPS web services and supports Digest, Basic and WSSE HTTP authentication mechanisms. This module is extremely common and very easy to use. The workshop itself (the Playbooks that provisioned the workbenches) uses the uri module to configure and license Red Hat Ansible Tower.
    - name: PUSH AS3
      uri:
        url: "https://{{ ansible_host }}:8443/mgmt/shared/appsvcs/declare"
        method: POST
        body: "{{ lookup('template','j2/tenant_base.j2', split_lines=False) }}"
        status_code: 200
        timeout: 300
        body_format: json
        force_basic_auth: true
        user: "{{ ansible_user }}"
        password: "{{ ansible_password }}"
        validate_certs: false
      delegate_to: localhost
Explanation of parameters:
| Parameter | Explanation |
|---|---|
- name: PUSH AS3 |
human description of Playbook task, prints to terminal window |
uri: |
this task is calling the uri module |
url: "https://:8443/mgmt/shared/appsvcs/declare" |
webURL (API) for AS3 |
method: POST |
HTTP method of the request, must be uppercase. Module documentation page has list of all options. This could also be a DELETE vs a POST |
body: "" |
This sends the combined template (the tenant_base.j2 which contains as3_template.j2) and is passed as the body for the API request. |
status_code: 200 |
A valid, numeric, HTTP status code that signifies success of the request. Can also be comma separated list of status codes. 200 means OK, which is a standard response for successful HTTP requests |
The rest of the parameters are for authentication to the F5 BIG-IP and fairly straight forward (similar to all BIG-IP modules).
Step 7
Run the playbook - save and exit back into the command line of the control host and execute the following:
[student1@ansible ~]$ ansible-playbook as3.yml
Playbook Output
The output will look as follows.
[student1@ansible ~]$ ansible-playbook as3.yml

PLAY [Linklight AS3] **********************************************************

TASK [Create AS3 JSON Body] ***************************************************
ok: [f5]

TASK [Push AS3] ***************************************************************
ok: [f5]

PLAY RECAP ********************************************************************
f5                         : ok=2    changed=0    unreachable=0    failed=0
Solution
The finished Ansible Playbook is provided here for an Answer key. Click here: as3.yml.
Verifying the Solution
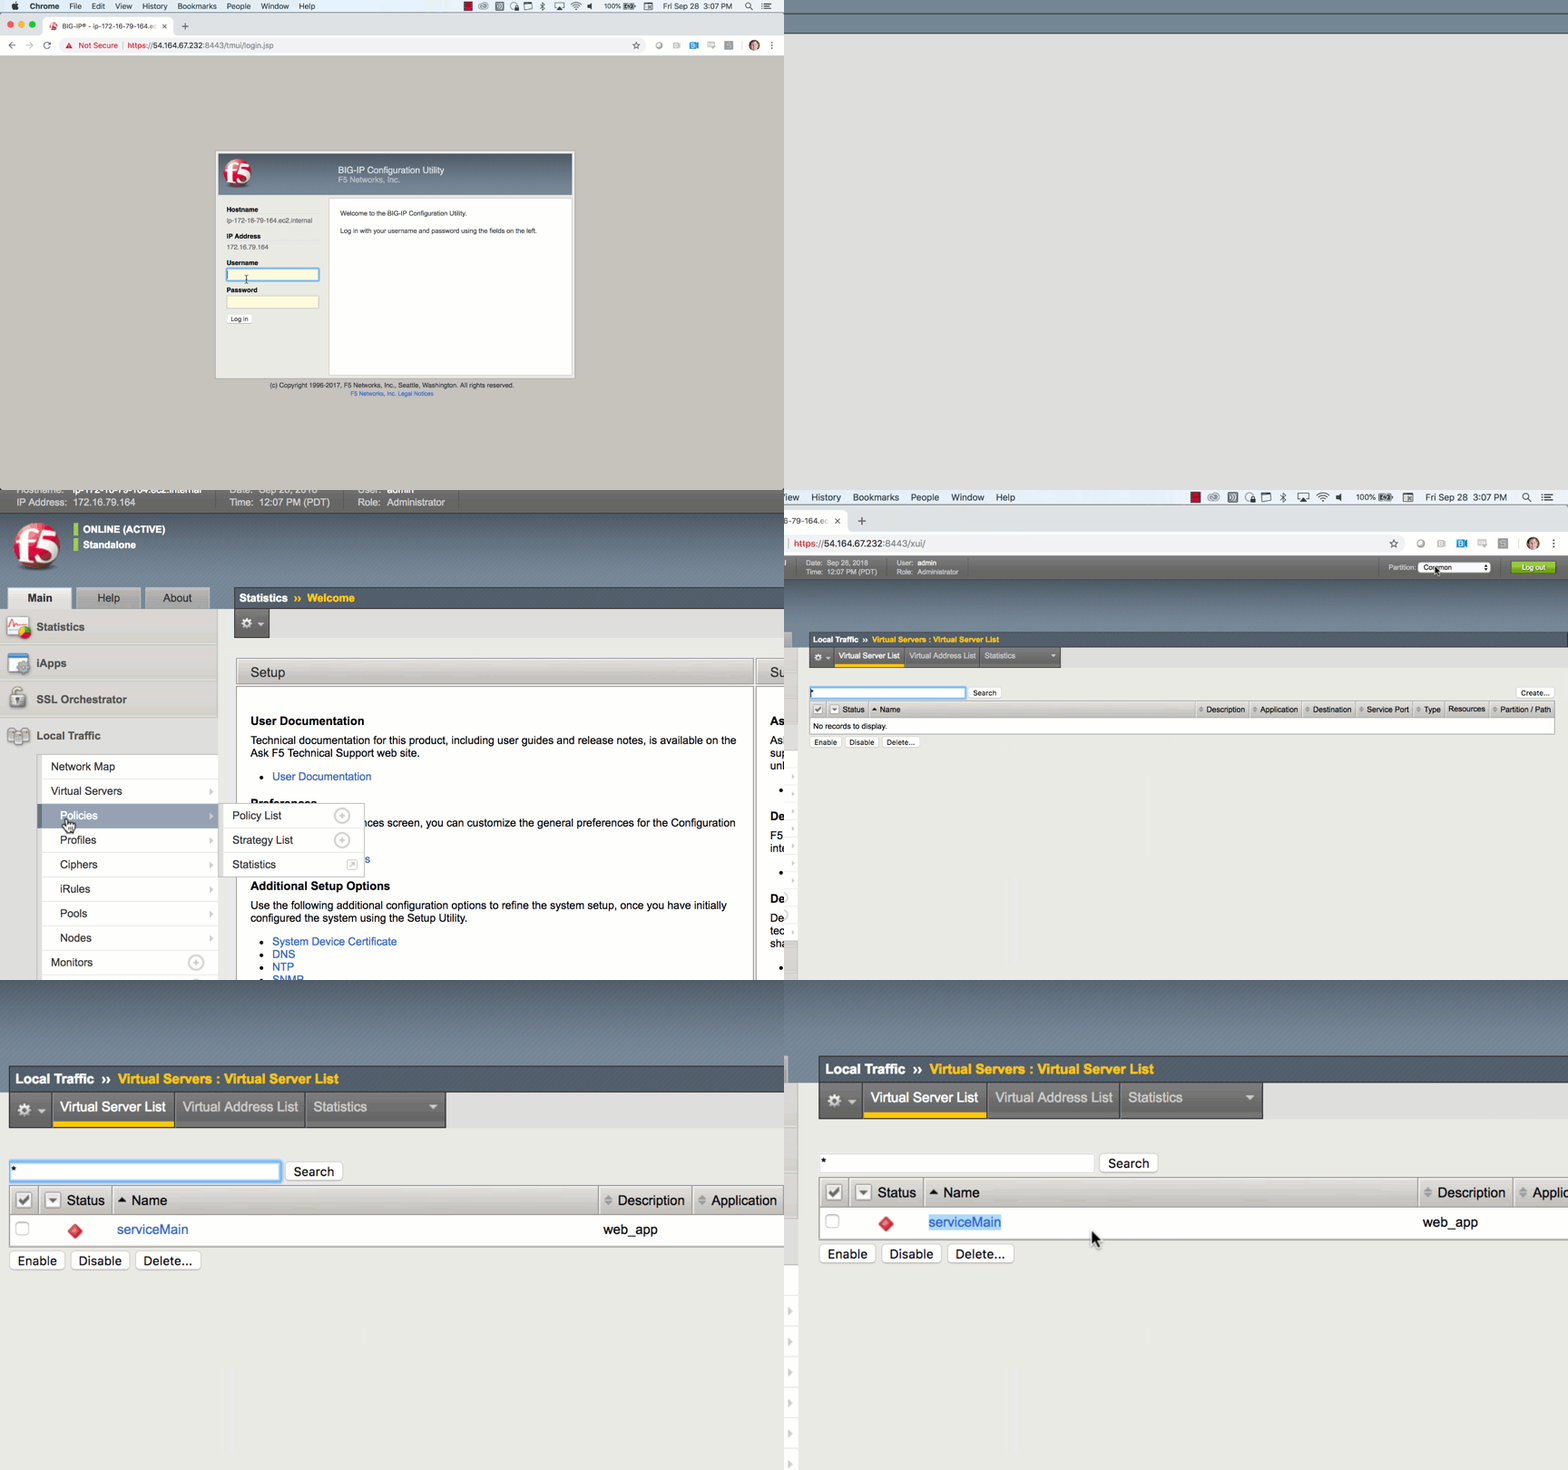
Login to the F5 with your web browser to see what was configured. Grab the IP information for the F5 load balancer from the lab_inventory/hosts file, and type it in like so: https://X.X.X.X:8443/

- Click on the Local Traffic on the lefthand menu
- Click on Virtual Servers.
- On the top right, click on the drop down menu titled
Partitionand select WorkshopExample - The Virtual Server
serviceMainwill be displayed.
You have finished this exercise. Click here to return to the lab guide
